
In this blog post, I will show you why and how to configure the Workspace ONE Tunnel, which you can use for your per- App VPN configuration. Using Workspace ONE UEM, you can deploy the Workspace ONE Tunnel software to endpoint devices, configure VPN Profiles and configure the VPN Policy settings.
Why you should use it
The VMware Tunnel can be configured as an Edge Service on VMware Unified Access Gateway (UAG), which enables Per-App VPN on managed mobile devices to further secure access to internal resources.
Whilst traditional VPN solutions enable full access from the endpoint device to the entire datacenter of the company, the VMware Tunnel allows individual applications to authenticate and securely communicate with specific backend servers, IP Subnets and resources.

High Level Architecture
The below illustration shows a managed Workspace ONE UEM device on the left. Some installed applications on the device require network connectivity to backend systems of the company to function correctly.
Within the VMware Tunnel configuration defined in Workspace ONE UEM, administrators can configure Device Traffic Rules to specify which application can use a specific resource within the company’s datacenter.
When an end-user is starting one of the configured applications in the Device Traffic Rules, the VMware Tunnel is started and will reach out to the internet to the company’s external firewall to the VMware UAG appliance(s) that are installed in the DMZ network. The UAG will then authorize access to the internal resource.

Minimum Requirements
Before you can think about deploying the VMware Tunnel, you will have to meet these requirements at a minimum:
- Workspace ONE UEM 2011 and later
- VMware UAG 3.3 and later (latest release is recommended)
- Tunnel FQDN and certificate
- VMware Tunnel 2.1.x software
- An endpoint/mobile device for the platform you plan to use. Windows 10, macOS, Android and iOS devices are supported
Of course, there are also requirements for the UAG appliance(s) itself and the network connectivity. You can find all these requirements here: https://docs.vmware.com/en/VMware-Workspace-ONE-UEM/2105/Tunnel_Linux/GUID-AWT-TUNNEL-VA-REQS.html
Deploy based on the security requirements
Depending on the security requirements, you will have to pick which mode is the best fit for your deployment: You can either deploy the VMware Tunnel for VMware UAG either in Basic or Cascade Mode:
- The Basic deployment model includes a single Unified Access Gateway appliance, which requires a public hostname and a dedicated port for each component.
- The Cascade deployment model architecture includes two instances of Unified Access Gateway with VMware Tunnel enabled on each. In cascade mode, the front-end server resides in the DMZ and communicates to the back-end server in your internal network.

For more information about the deployment models, please refer to: https://techzone.vmware.com/configuring-vmware-tunnel-edge-service-workspace-one-operational-tutorial#_1064031
Easy Deployment
The deployment of the VMware Tunnel is very easy…! We basically need to configure two components:
- Workspace ONE UEM
- Service Account creation for the VMware UAG
- Testing the VMware UAG and Workspace ONE UEM connection
- Configuration of the VMware Tunnel Device Traffic Rules
- Distribution of the VMware Tunnel to endpoint/mobile devices
- Creating and Assigning the VPN Profile
- VMware UAG appliance(s)
- Deployment and configuration
- Configuring the VMware Tunnel Edge Services
Note: NSX integration is optional and will not be covered in this blog.
In the next chapters, I will show the the high-level configuration of these components.
Configuring Workspace ONE UEM
As a first step, we need to create a custom Role and assign this role to a Service Account in the Workspace ONE UEM admin console.
Minimum permission for this Role is REST Enterprise Integration. Assign this role to the local Service Account.

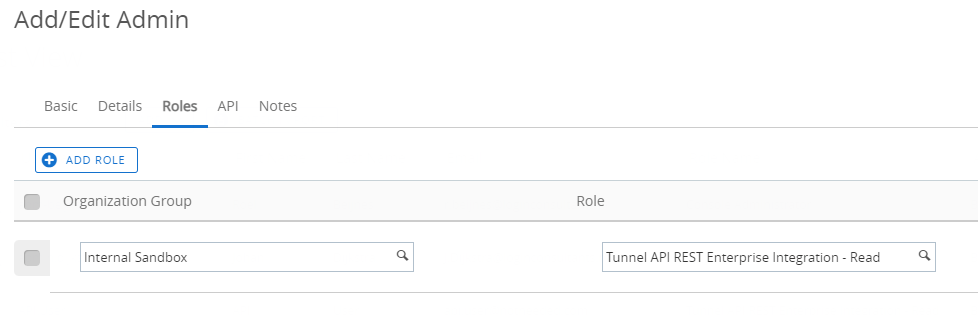
The Service Account will be used for the VMware UAG configuration in the next chapter.
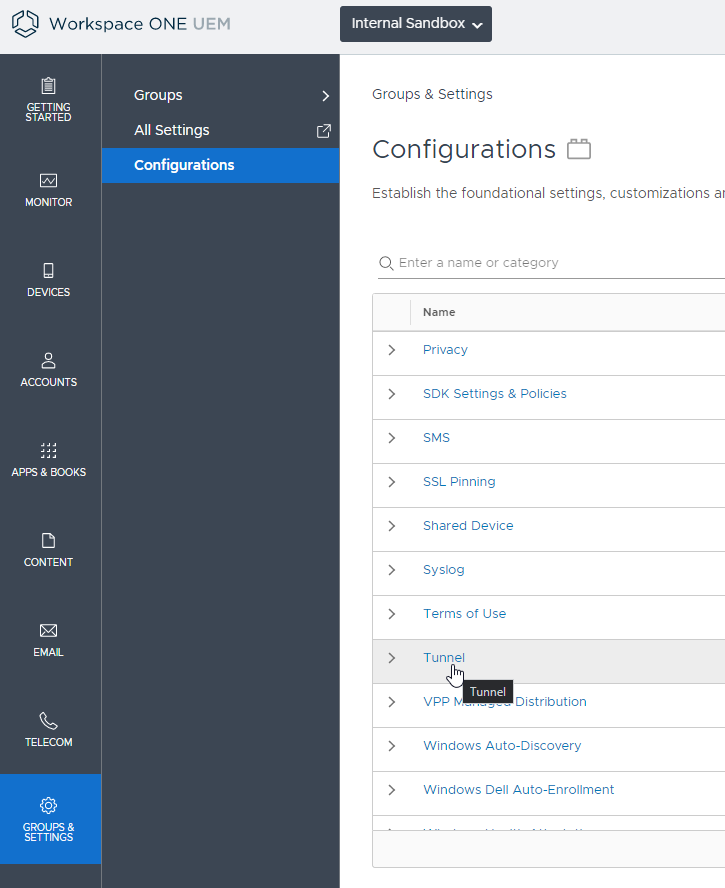
VMware Tunnel Configuration
As a second step, the VMware Tunnel must be configured.
Basically, we need to configure the FQDN of the UAG, specify if we want to configure the Basic or Cascade mode (as mentioned in the above chapters) and configure the port on which Workspace ONE UEM and the UAG will communicate with each other. Optionally, we can also configure a custom certificate for Server and Client authentication, or leave it on default AirWatch certificates.
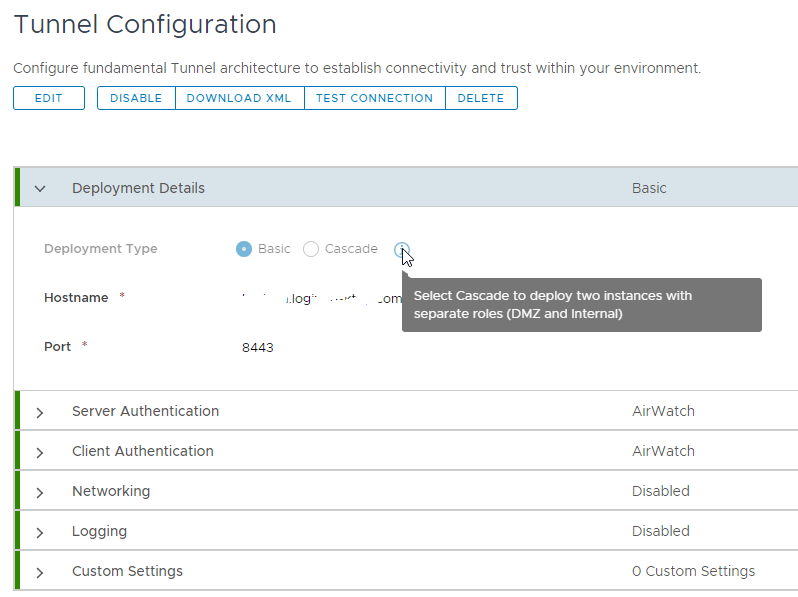
Once you are happy with the settings, you can even test if you can make a successful connection to the UAG (for configuration, see next chapter!)

Device Traffic Rules
As a third step, we will configure the Device Traffic Rule Sets, which defines the rules for each app that will use the VPN Tunnel for connection to the Backend Servers (Destination).

Admins can specify which Tunnel Mode they want to use. Options are:
- Per Application: This option restricts tunnel traffic only to authorized applications and destinations (Domain FQDN’s, IP Subnets)
- Full Device: This traffic is restricted based on the authorized destinations (domains or IPs), regardless of the application. Full Device mode requires Workspace ONE UEM 2102+, Workspace ONE Desktop Tunnel 2.1+, and it is available only on Windows 10.
Note: It’s not possible to configure an endpoint device to perform Per-App and Device Tunnel at the same time.

To add a Destination, admins can use the following rules:
- Domain FQDN, you can use a * before or after the domain name.
- Note *.* or * will not work for Apple Safari
- IP or Subnet IP and Port number
- Some examples:
- 10.10.0.1 -> (Single IP)
- 10.10.0.0/24 -> (Subnet IP)
- 10.10.0.0/24[443] -> (Single port)
- 10.10.0.0/24[80,443] -> (Multiple ports)
- 10.10.0.0/24[1000-2000] -> (Port Range)
- Some examples:
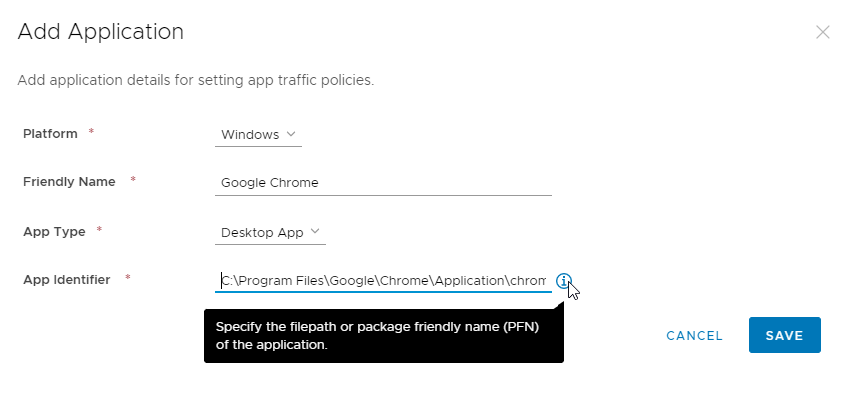
As mentioned earlier, administrators can add or remove applications that will be used in the VMware Tunnel. The options are:
- Specify the platform
- Specify if it’s a Desktop App or Store App
- For Windows 10:
- Specify the exact path to the application executable or specify the PFN. You can get the PFN details with the Get-AppX command.
- Use the App Identifier System to be able to use SMB. This will enable users to connect to File shares or network printers.
- For MacOS:
- Enter the application’s package id, which is the Identifier value displayed by running the command:
- codesign -dv –entitlements – /path/to.ap
- Enter the application’s designated requirement, which is displayed to the right of the => sign of the following command:
- codesign -d -r- /path/to.app
- For iOS and Android: Select the app from the application list in Workspace ONE UEM
- Enter the application’s package id, which is the Identifier value displayed by running the command:
You can configure as many Device Traffic Rules as you want. For example, specific one for the Sales department, one for Finance, IT, etc. We deploy the specific settings with the VPN Profile.
VPN Profile
Admins have to specify the following information for configuring the VPN Profile:
- Connection Name
- Connection Type: Select Workspace ONE Tunnel from the drop-down menu
- Specify the specific Device Traffic Rules (in my case, Default)
- Windows 10 only:
- Desktop Client: Enable (as per VMware recommendation)
- Custom Configuration: Admins can configure some advanced settings in here, such as (and not limited to)
- StartTunnelPreLogon – Starts the Tunnel in the logon screen
- TrustedNetworkProbeUrl – Probes the internal network for an internal URL. If available, the VMware Tunnel will not be used.
- ToggleTunnelFeature – If it’s allowed by company policy, this setting will allow users to switch off the VMware Tunnel by right-clicking the SysTray icon.
- ExcludeFQDN – Comma separated list of domain FQDN’s whose resolution should not be tunneled
- Trusted Network Connection: Specify the trusted internal domain FQDN whose resolution should not be tunneled
- DNS Resolution via Tunnel Gateway: Enable this when using The VMware Tunnel 2.1, this means you do not have to specify all the Domain FQDN you have specified in the Device Traffic Rules already.
If everything is configured, deploy the VPN Profile to your endpoint devices that are listed in the specific Workspace ONE UEM Smart Group.

VMware Tunnel application deployment
The last step in the Workspace ONE UEM configuration is distributing the VMware Tunnel application to the endpoint devices. Download the VMware Tunnel software at: https://my.workspaceone.com/products/Workspace-ONE-Tunnel/
Add the application to your Workspace ONE UEM environment.
- For Windows 10: Add the VMware Tunnel app executable with the /Install /Passive parameters
- For MacOS and iOS: The VMware Tunnel app is available for free on the App Store. It is also available for managed distribution volume licensing through Apple Business Manager and Apple School Manager.
- For Android: The VMware Tunnel app is available for free on the Play Store. Administrators must approve the application for usage in UEM. Once approved, assign the app to the Smart Group.

Administrators can verify in the UEM console if the VPN Profile and Tunnel application are successfully deployed.


Configuring VMware UAG
Whether you are configuring the UAG manually or with PowerShell, you will need to enter the following information:
- API Server URL: https://<tenant ID>.awmdm.com
- API Server Username & Password: The Service Account you will have to create in Workspace ONE UEM (see next chapter!)
- Organization Group ID: The Workspace ONE UEM Org ID
- Tunnel Server Hostname: The VMware Tunnel FQDN
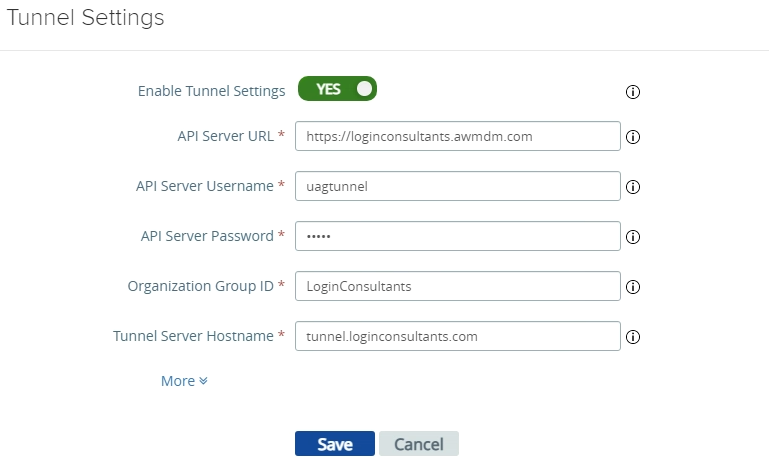
Once added successfully, you should see a green dot. Any other color means there is no connection between the UAG and Workspace ONE UEM.

The End-User Experience
When everything is installed and configured, end-users see the Workspace ONE Tunnel is installed and active via the systray icon.
As you can see in the screenshot, the Workspace ONE Tunnel will automatically connect when applications require it.

Here can you see the Workspace ONE Tunnel is connected. End-users can also see the configured Device Traffic Rules.
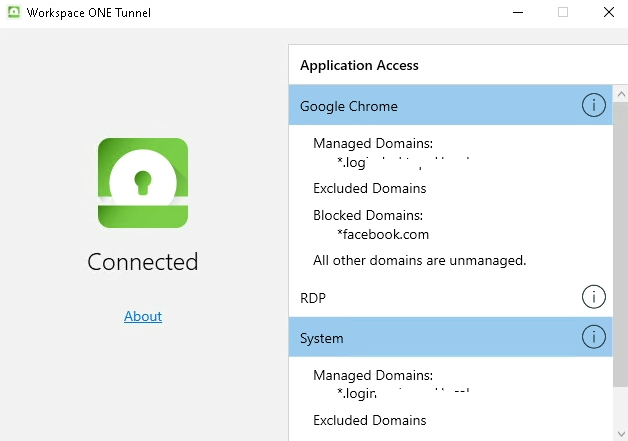
Here you can see an example of opening a managed domain URL from the Chrome and Firefox browsers. As expected, the VPN connection works from the Chrome browser, and doesn’t work from the Firefox browser!

Workspace ONE Intelligence
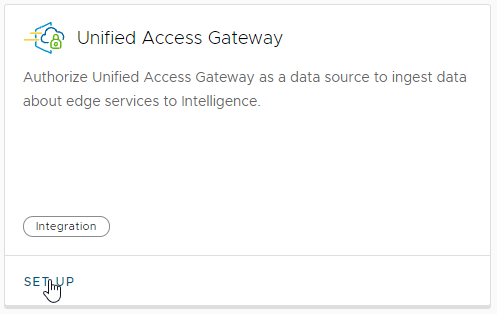
A fairly new feature within Workspace ONE Intelligence; Administrators can now add a Workspace ONE Tunnel Dashboard.
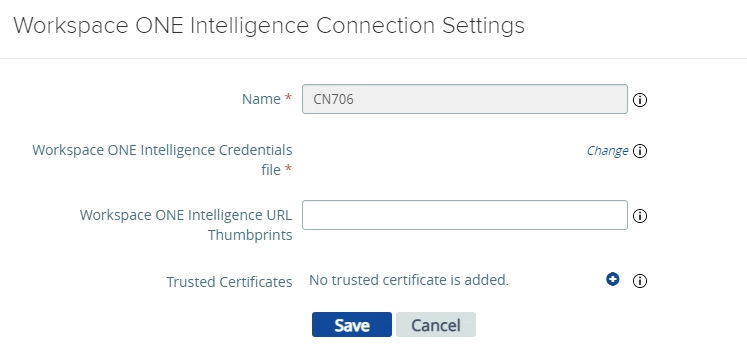
The first step is to setup the UAG integration.
Next, the credential json file must be downloaded.
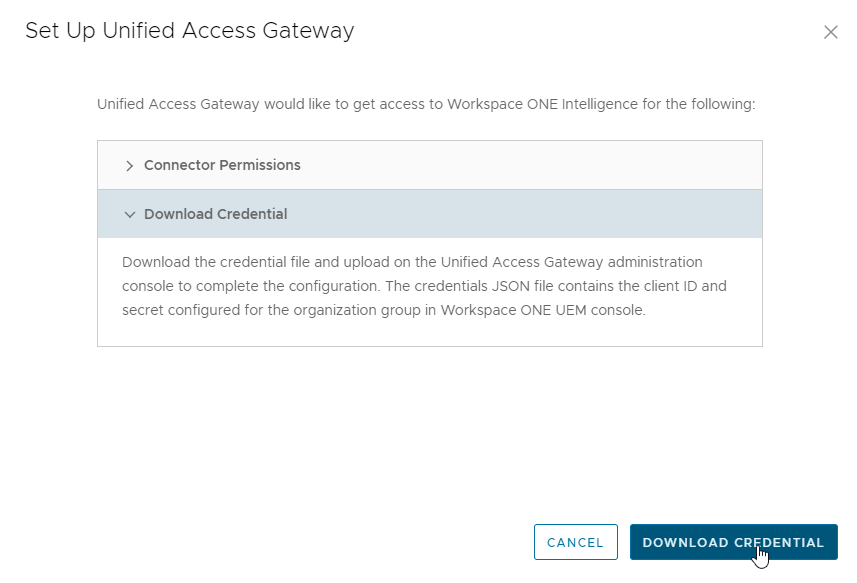
From the UAG admin portal, administrators can activate Workspace ONE Intelligence and upload the json file.
Please note the UAG version must be 2106 and later.

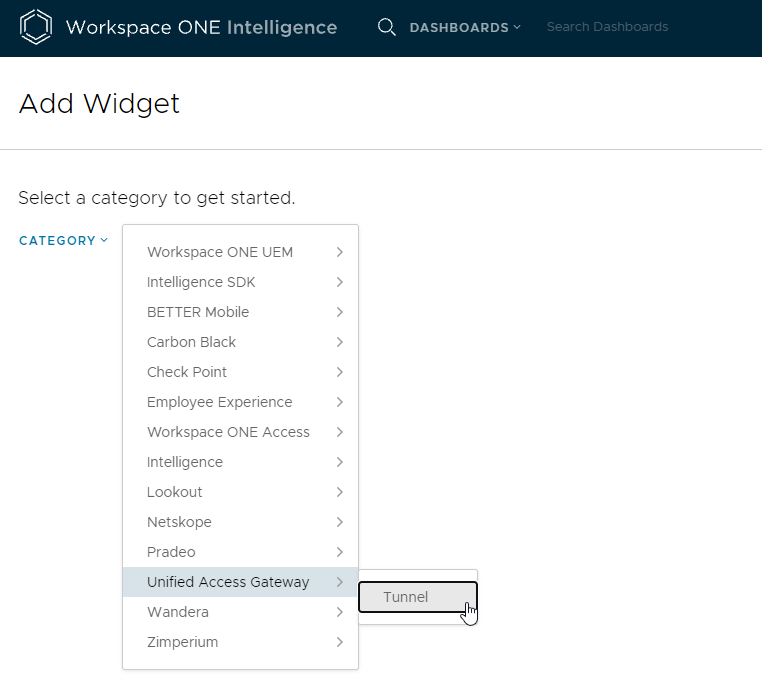
Once completed, administrators are able to create a nice dashboard by adding the UAG Tunnel widget.
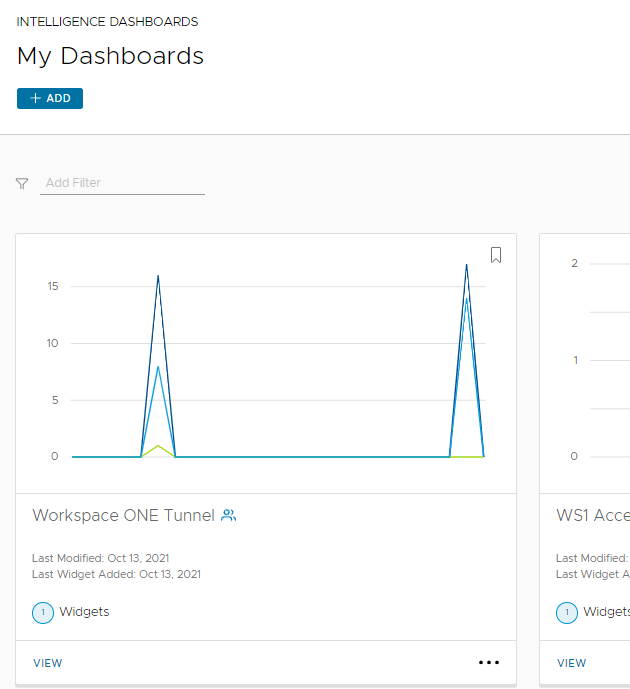
Specify the dashboard parameters (the below is just an example)

Hit save and view your newly created dashboard!
VMworld 2021
There were some interesting announcements from VMworld 2021 with regards of Workspace ONE UEM, Intelligence and the Workspace ONE Tunnel.
VMware announced Continuous Access Controls for real-time security, which means the Workspace ONE Tunnel will enable smarter app access by leveraging deeper security points. Read more about it here:
https://blogs.vmware.com/euc/2021/10/vmworld-2021-tunnel-continuous-access.html
Conclusion
To conclude, setting up the Workspace ONE Tunnel is not that difficult and I would recommend customers that still run a traditional VPN to look at this solution to further enhance security requirements.
With the integration of Workspace ONE Intelligence and the announced Continuous Access Controls, VMware is showing the VMware Tunnel is full in development. I’m expecting lots of new features, that will further enhance security and visibility, to be added in the near future!
Recommended reading material:


Leave a Reply