App-V in Windows Support policy
As you might know, the Microsoft Application Virtualization (App-V) feature is no longer being developed, and has moved to a fixed extended support lifecycle. As part of extended support, it will continue to ship as part of Windows, but requests to change product design or add new features aren’t available.
This is applicable for both the App-V client and App-V Sequencer. This means the App-V server components are still deprecated and support will end in April 2026.
Workspace ONE UEM
After April 2026, companies have several options to distribute App-V packages to their virtual and physical endpoints, including (and not limited to):
- Continue using the Microsoft App-V infrastructure servers without official support, or use PowerShell.
- Distribute the package with the new feature App-V in App Attach
- Re-recreate the package as MSIX
Within the Omnissa product suite, there are also some options to distribute the Microsoft App-V packages to virtual and physical endpoints:
- Convert the Microsoft App-V package to Omnissa App Volumes package
- Once you have an App Volumes package, in addition to distributing to virtual desktops, you can also distribute these packages to physical endpoints
- Distribute the App-V packages directly to Workspace ONE UEM managed endpoints (…Because we can!)
Convert the App-V package to App Volumes
This scenario is for (non) persistent virtual desktops. Since App Volumes 2410, we can use the Omnissa App Volumes Application Capture Command-Line Program (appcapture.exe) to convert an App-V (Microsoft Application Virtualization) application package to an App Volumes application package. There are some prereqs to to adhere to, as you can read here.
Once all these are met, you can go ahead and start the capture process.
First, make sure your “vanilla” VM is equipped with the App Volumes Tools installation. I say this specifically because appcapture.exe is also present during the normal Agent installation.
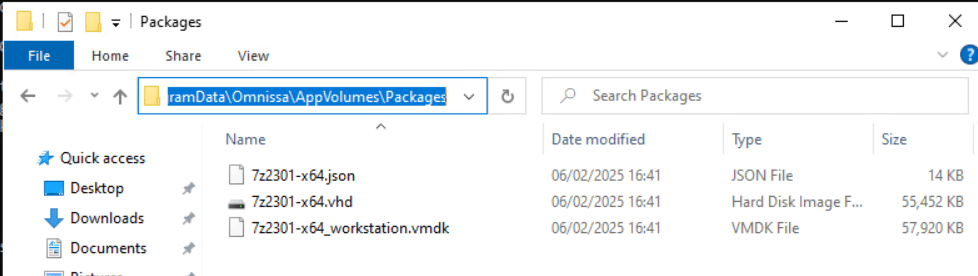
Start the command line “C:\Program Files\Omnissa\App Volumes\Agent\appcapture.exe /packagefromappv “location_of_the_appv_package”

The package is created in C:\ProgramData\Omnisssa\AppVolumes\Packages
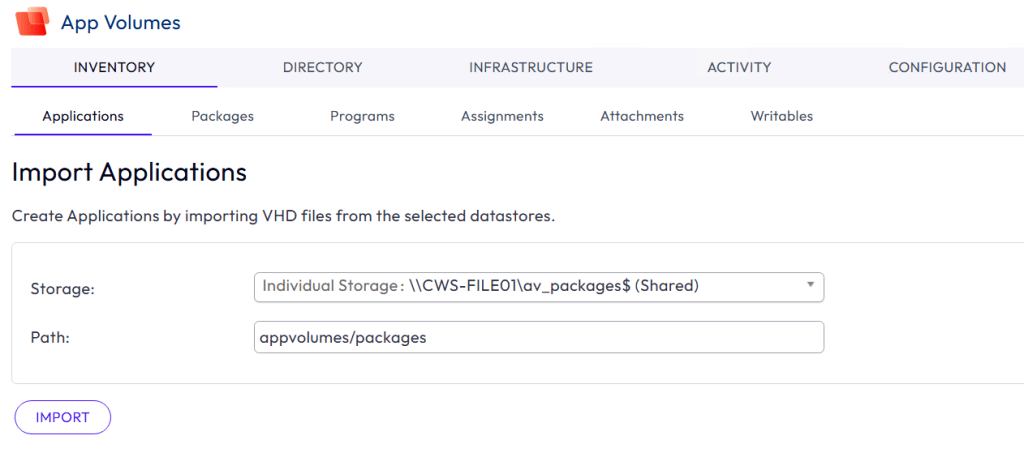
You can now “simply” copy the files to your App Volumes “.VHD file share” or “.VMDK vSphere datastore” and use the Import button in the App Volumes Mgt Console to import the newly created package. In my case, this is a file share.


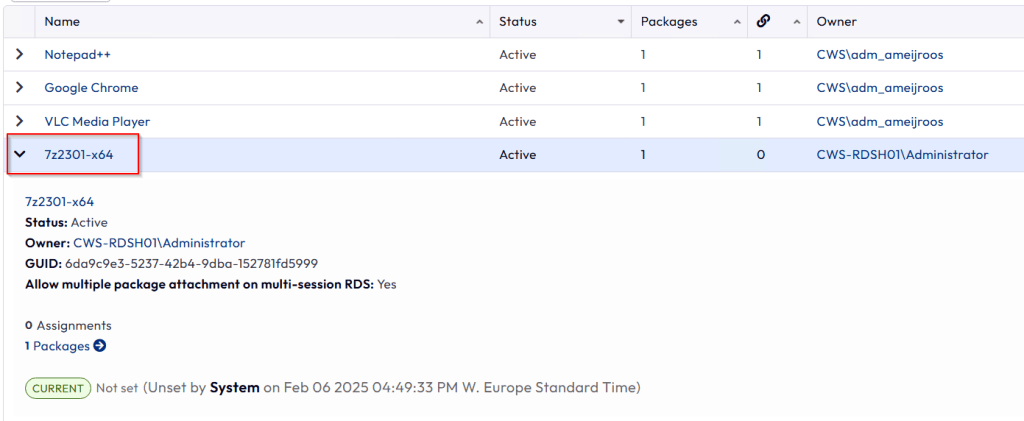
Once completed, distribute the package like you normally do to your user groups or devices.
Distribute App Volumes packages to physical endpoints
As I mentioned, the above option is a great feature for (non) persistent virtual desktops. But what about physical endpoints? I agree, this isn’t really an App-V scenario, but you can – in theory – convert the newly created App Volumes package from App-V to MSI. (I realize it makes far more sense to convert your natively built App Volumes packages from VHD to MSI)
The .MSI application package can be delivered to a Windows endpoint using endpoint managers such as Workspace ONE UEM, Microsoft Intune, or Microsoft Configuration Manager. These applications can be installed and uninstalled using MSI commands I will explain below. After the application is installed, the application persists in the endpoint until the application is uninstalled. Even if the endpoint reboots, shuts down, the application is always entitled to the user and remains functional . When the user logs back in (after a reboot or shutdown), the entitled application gets virtualized automatically.
After the MSI is deployed, it’s good to know the MSI isn’t actually installed; it will use the App Volumes delivery technology instead by mounting a virtual disk file to the endpoint. The virtual disks are being cached locally in the C:\ProgramData\Omnissa\AppVolumes folder, meaning the applications will also work when in offline mode.
The prereqs are for deploying App Volumes MSI packages to Windows Endpoints are:
- Just like described above, you will need a “Vanilla” VM with App Volumes Tools installed
- You will need to install the App Volumes Agent on Windows endpoints using the following parameters:
- msiexec /i “App Volumes Agent.msi” /qn DIRECTMODE=1
Using the DIRECTMODE=1 parameter, it’s good to mention there are no App Volumes Managers required!
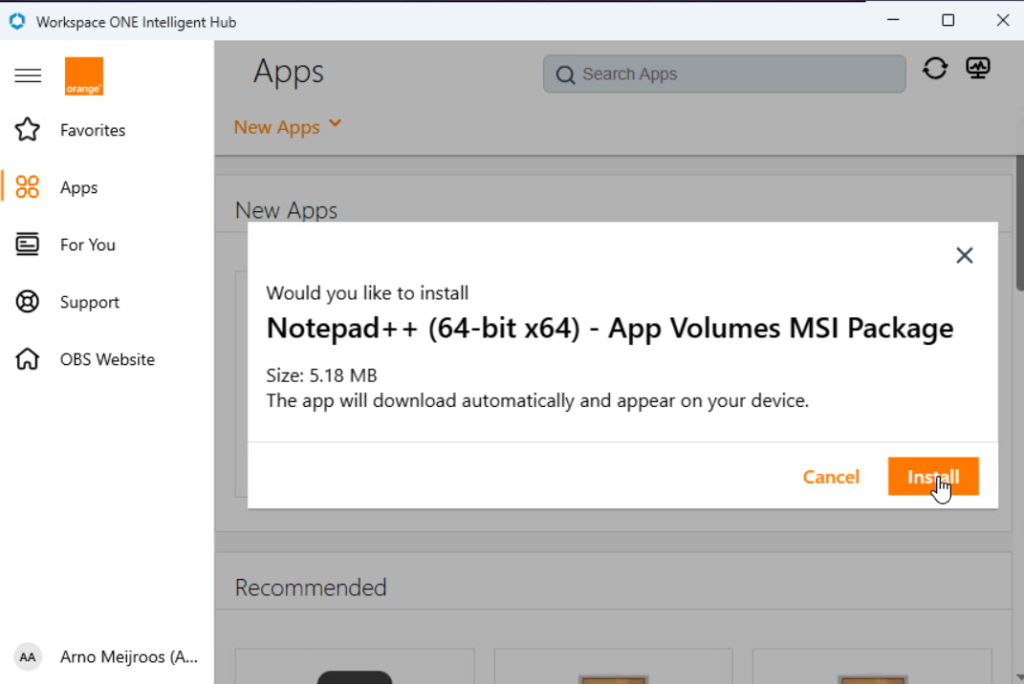
Let’s start the .VHD file conversion to .MSI. Start the command line “C:\Program Files\Omnissa\App Volumes\Agent\appcapture.exe convert /file “path_to_vhd_file” /format MSI

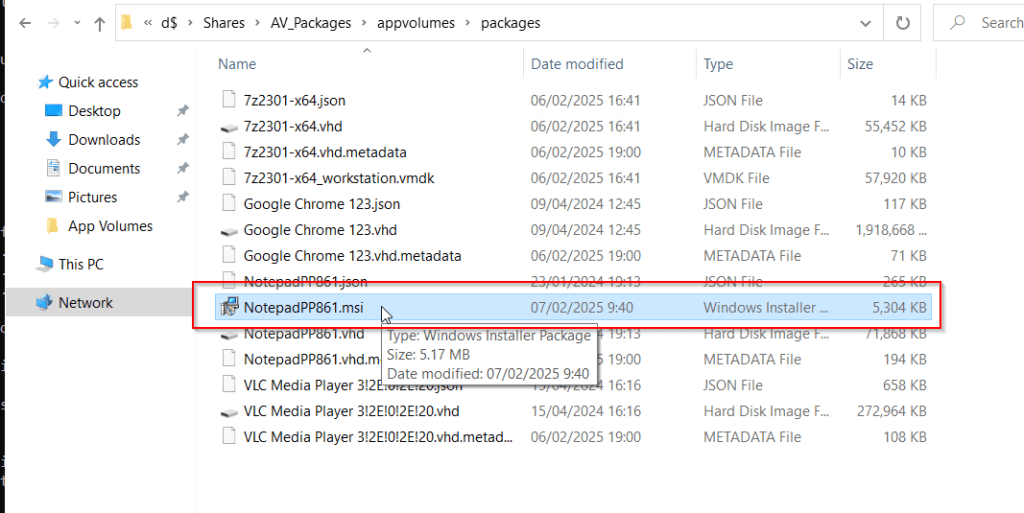
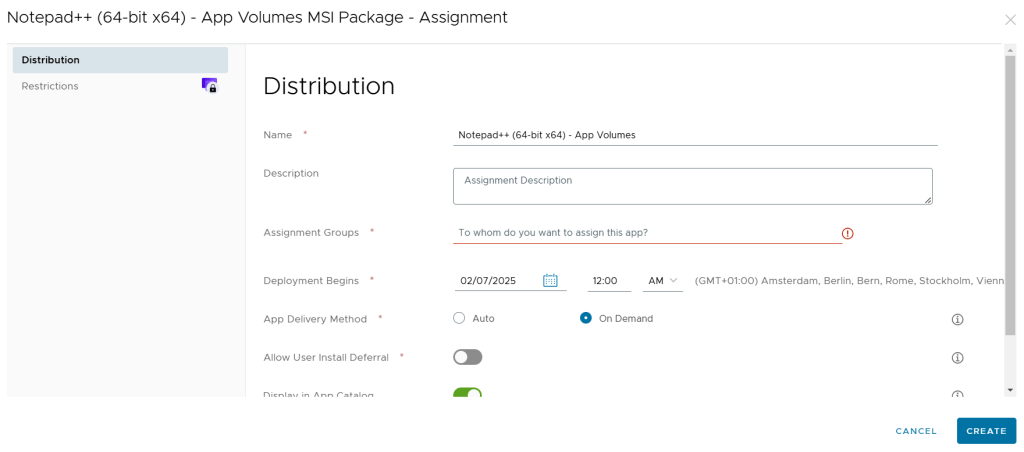
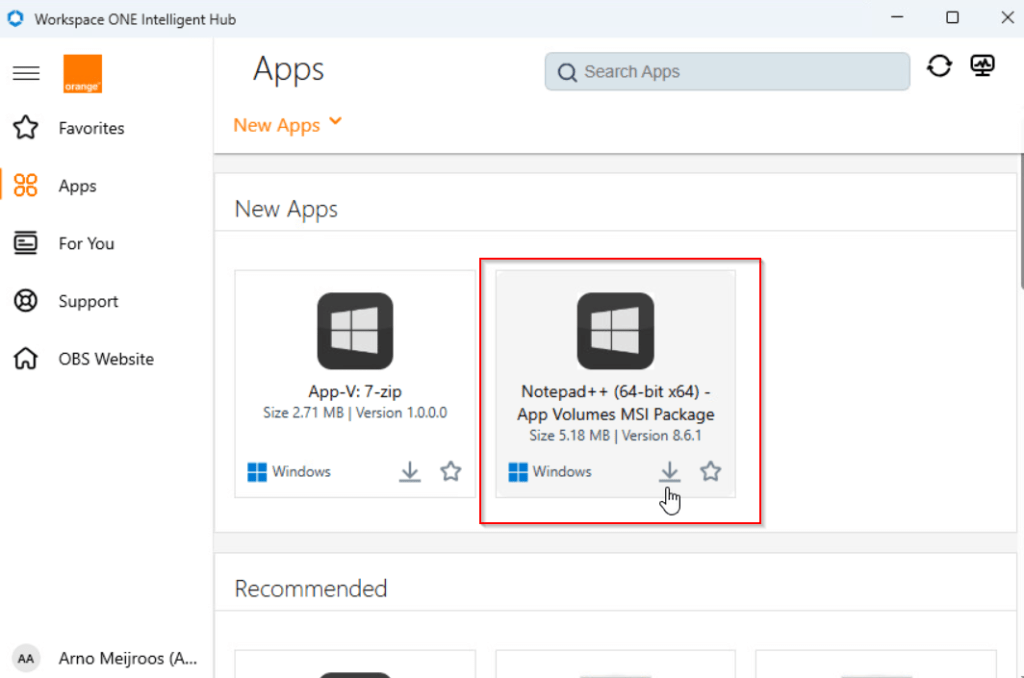
You can now use this .MSI to distribute with your preferred application distribution tool. In this case I’m using Workspace ONE UEM. Here are a couple of screenshots:
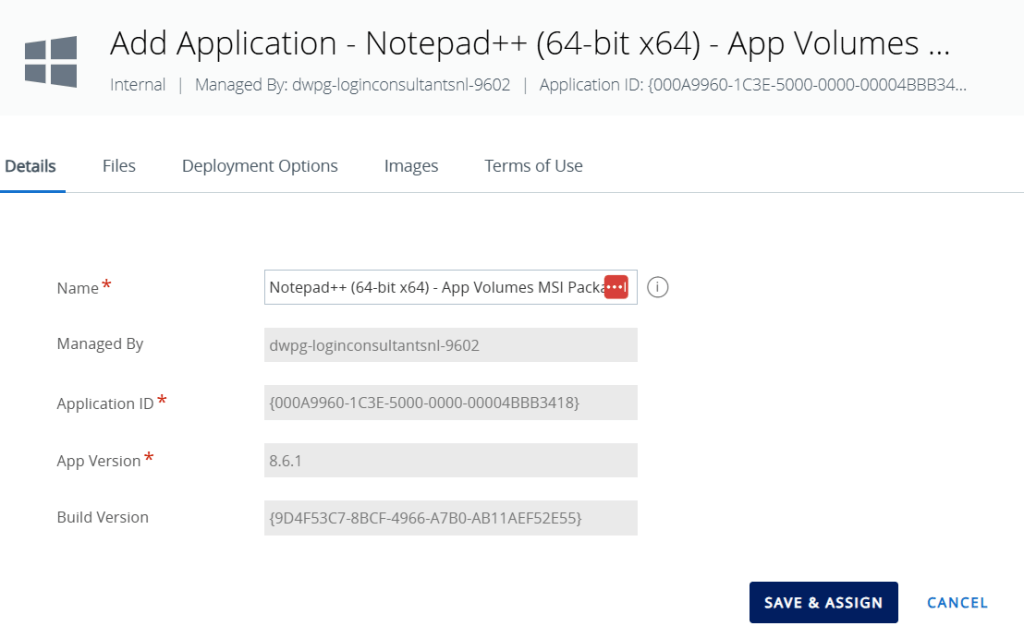
Note that the installation parameters are automatically filled in. You can optionally add some parameters to change the behavior of the package:
- NOARP=1
- This means the App Volumes MSI application entry is not listed in Add/Remove Programs
- NOARP=0
- The App Volumes MSI application entry is listed in Add/Remove Programs
- DELIVERYTYPE=Classic
- This means the disk is immediately mounted, even without starting the application. The disk mount remains active, even when the endpoint reboots.
- DELIVERYTYPE=On-Demand
- This is the default App Volumes delivery type and means the disk is mounted when the application is started. The disk mount is removed when the endpoint reboots.
More information can be read here.

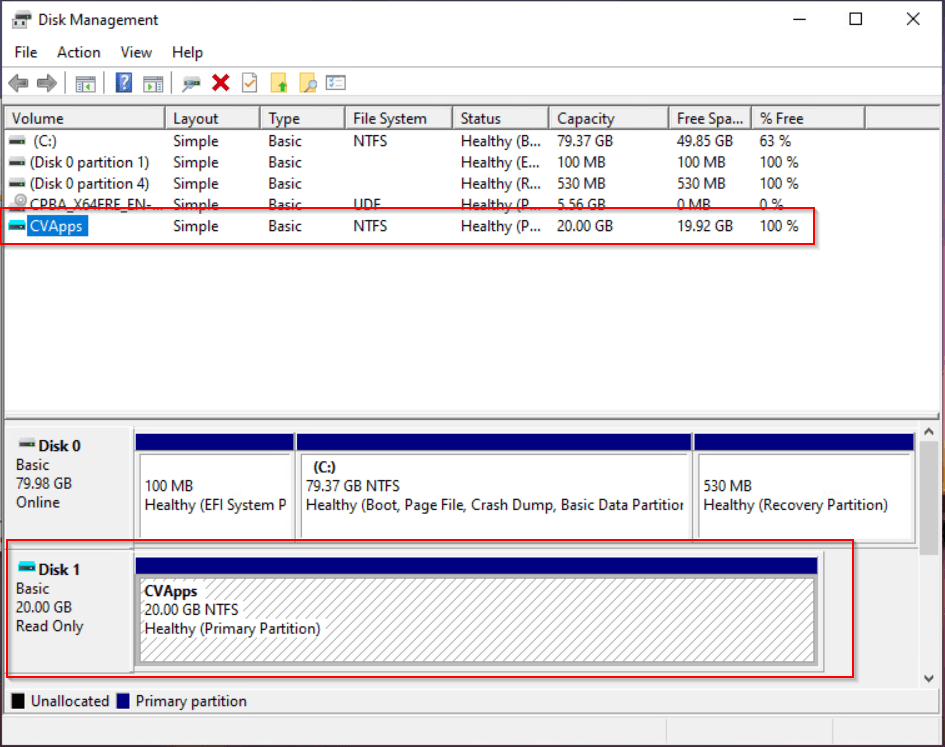
Let’s take a look at the physical Windows endpoint. In my case, it’s just a persistent VM in my lab managed by Workspace ONE UEM.
Note: Remember, you will need to deploy the App Volumes agent with the DIRECTMODE=1 parameter first.


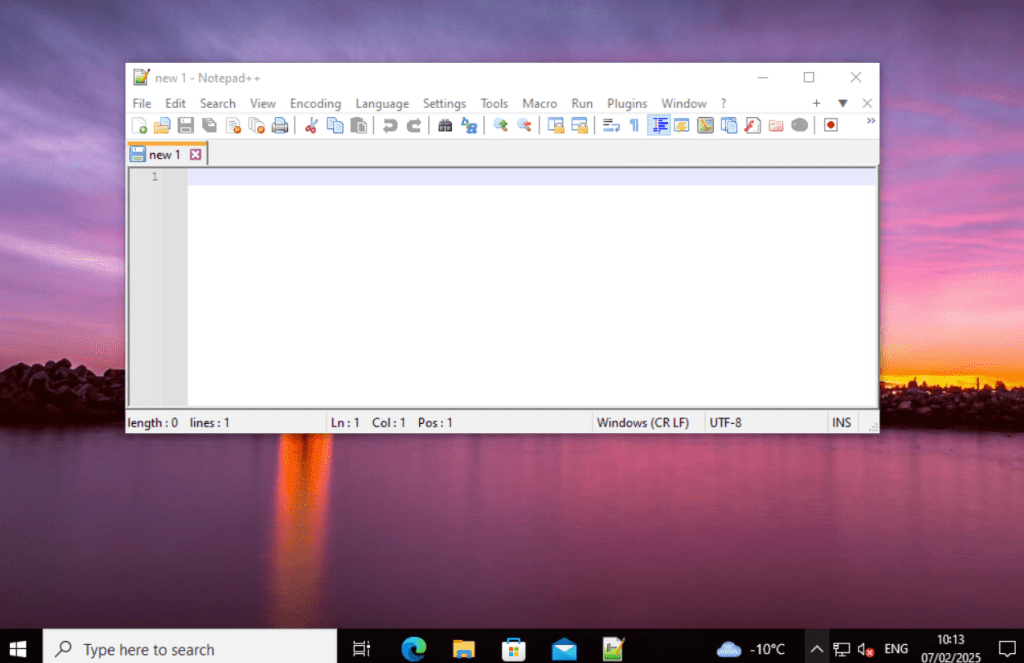
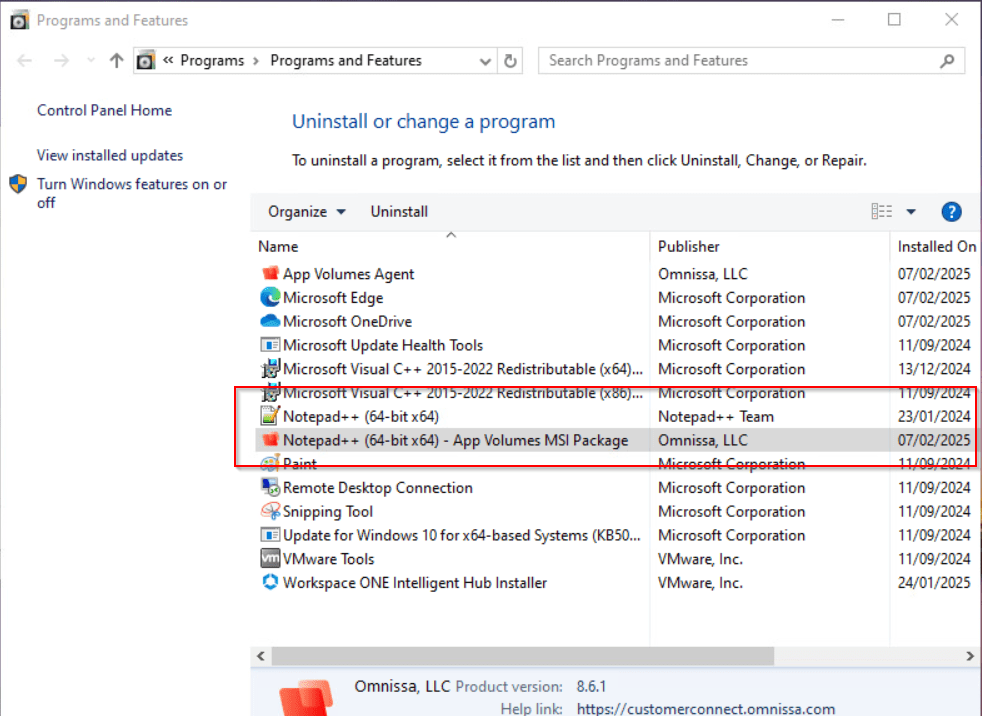
As you can see, a new virtual disk has mounted to the system:
You’ll notice NotePad++ is installed in the Add/Remove programs wizard. Notice that you see NotePad++ two times here. If you install the MSI package with the “NOARP=1” parameter you will only see the application one time.
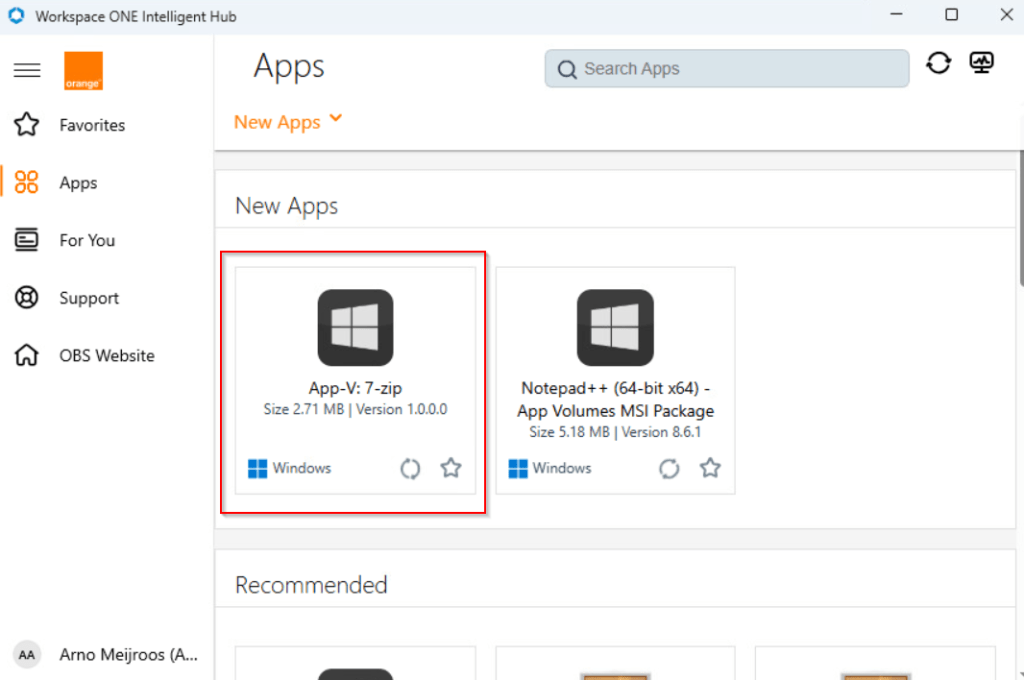
Distribute an App-V package with Workspace ONE UEM
Yes, you are reading this correctly. With Workspace ONE UEM it’s possible to deploy a Microsoft App-V package to Windows endpoints. The scenario here would be managed Workspace ONE UEM Windows devices, such as physical Windows endpoints and persistent Windows VMs. Why should we do this? Because we can! 🙂
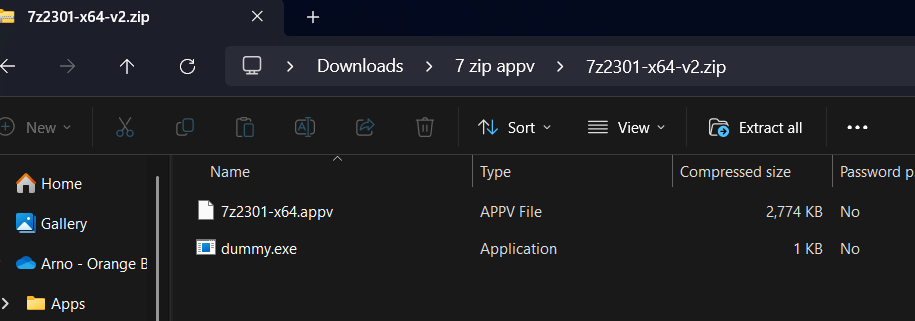
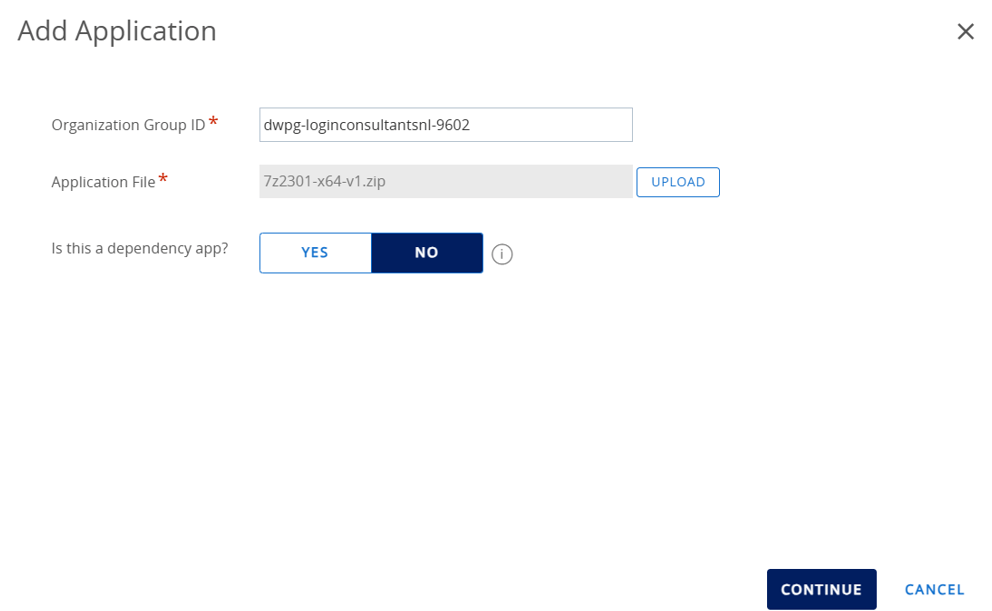
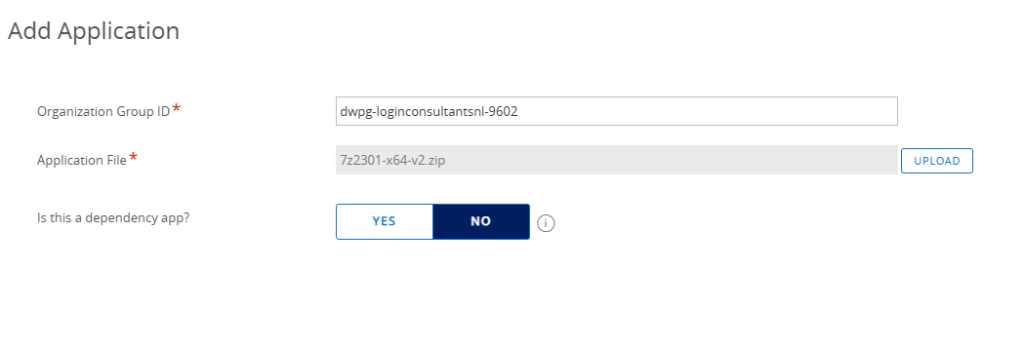
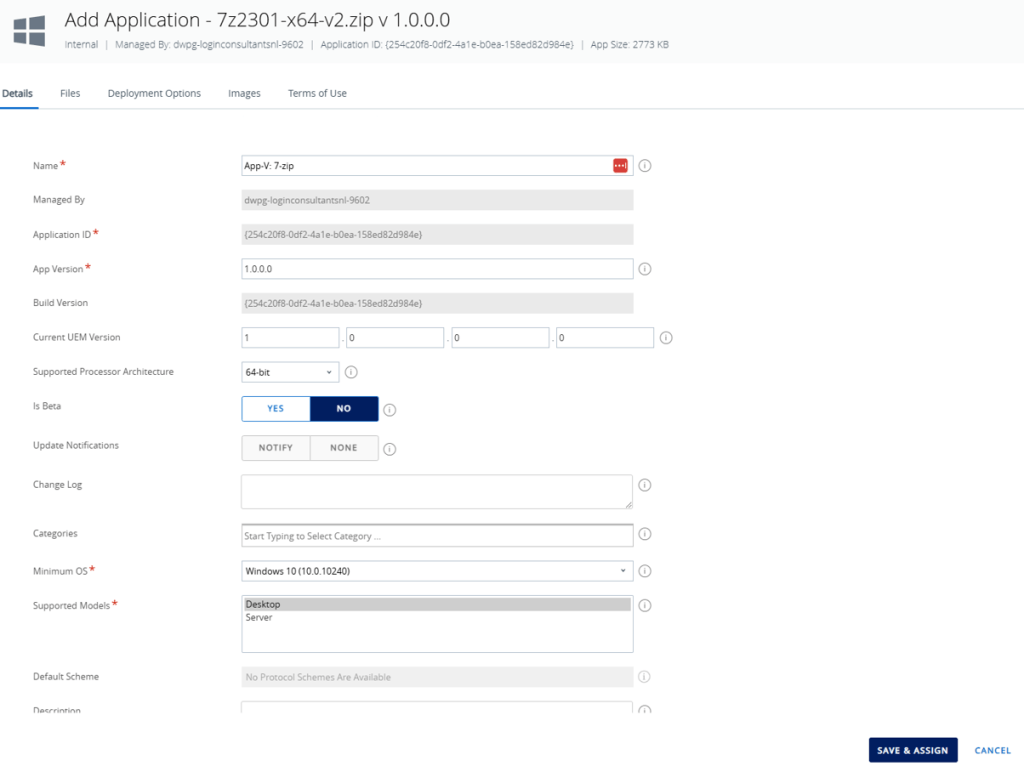
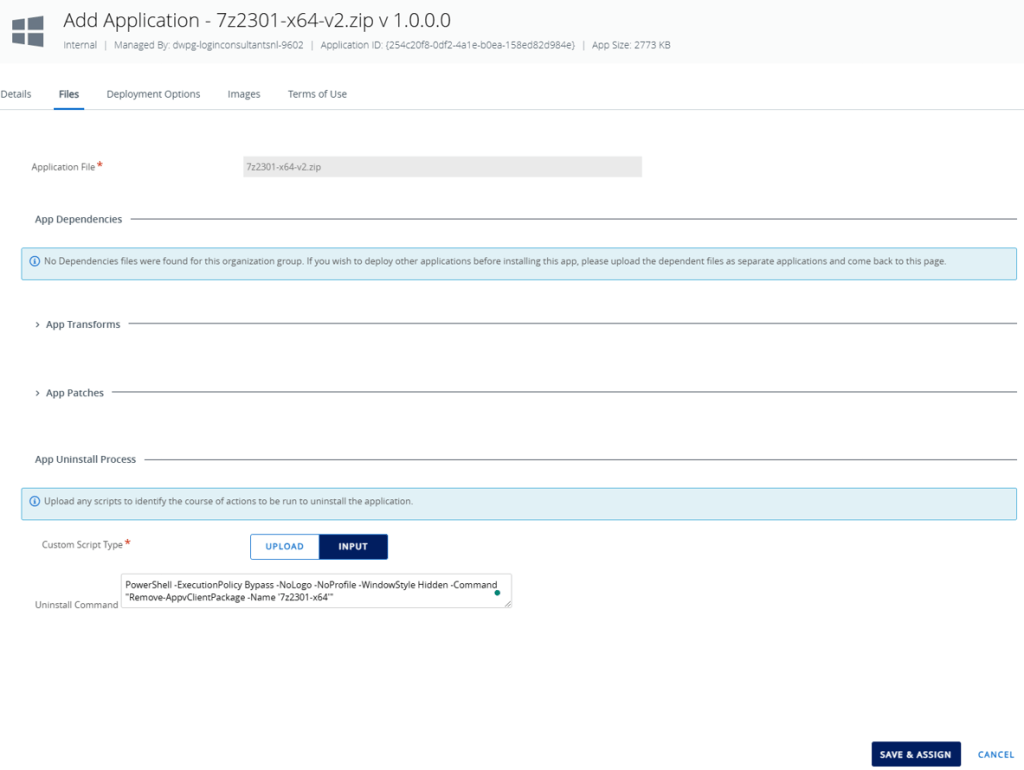
First, you will need to upload the .APPV package to Workspace ONE UEM. You can do this in a .ZIP file, but make sure to include a dummy.exe otherwise the upload will fail.
You can deploy the .APPV with the following command: PowerShell -ExecutionPolicy Bypass -NoLogo -NoProfile -WindowStyle Hidden -Command “Add-AppvClientPackage -Path ‘.\your_appv_package.appv’ | Publish-AppvClientPackage -Global | Mount-AppvClientPackage -Verbose”
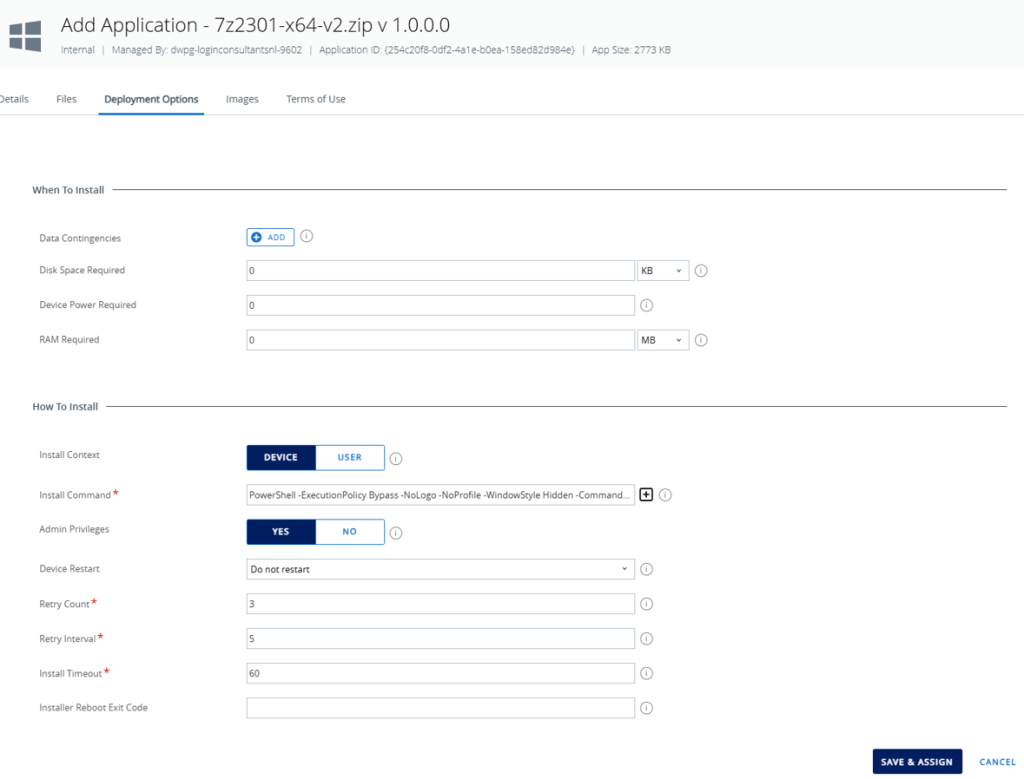
The uninstall command looks like this: PowerShell -ExecutionPolicy Bypass -NoLogo -NoProfile -WindowStyle Hidden -Command “Remove-AppvClientPackage -Name ‘your_appv_package_name’”
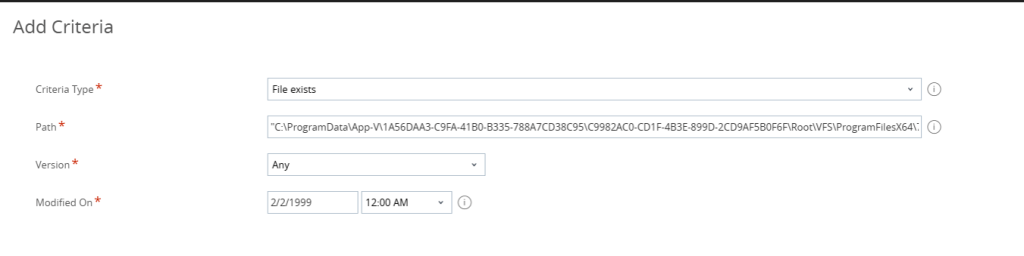
If you know the installation details, you can fill in the installation success criteria, for example the path to the APP-V folder and files.
Once done, create the Assignment and Deploy the App-V.

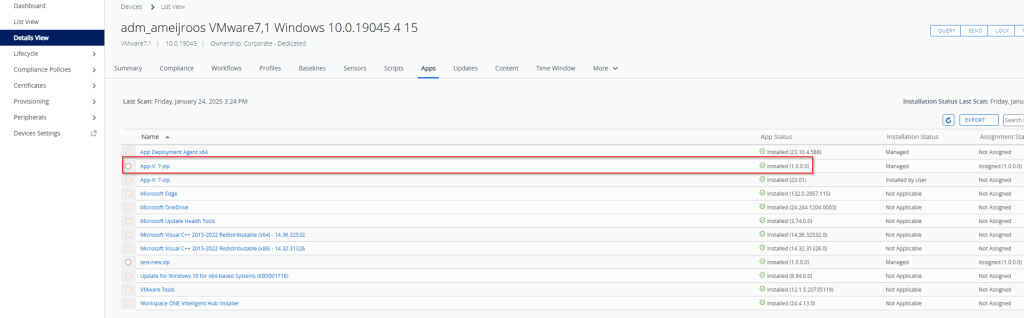
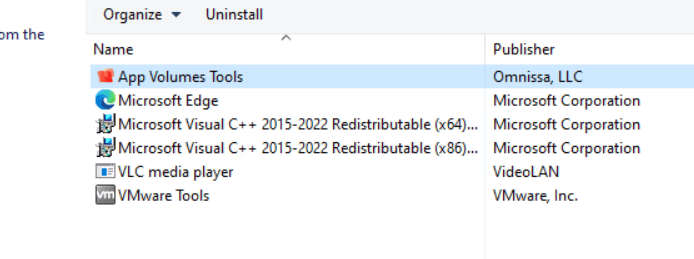
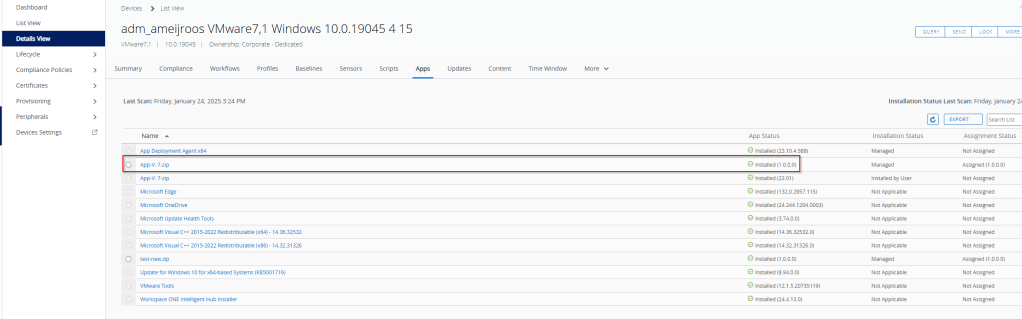
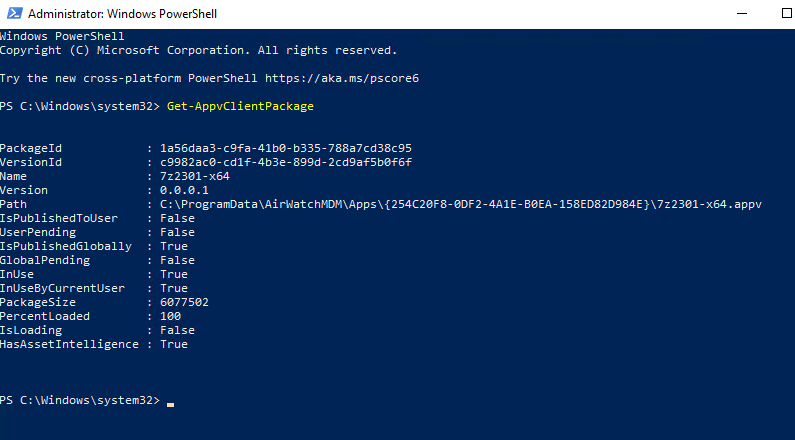
Validate that the App-V package is installed:


Conclusion
I think it’s great Omnissa provides administrators with methods on how to create, convert and distribute packages to endpoint devices. As you can see, the converting process is really easy and very fast.
Please note, that I’m by no means an App-V expert. If you know any better way please let me know in the comments!


Leave a Reply