In this short blog I want to show one of the possibilities how to deploy Omnissa (former VMware EUC) Horizon Agent on Windows systems, namely using Microsoft Configuration Manager (aka ConfigMgr aka SCCM aka Microsoft Endpoint Manager).
We need to deploy Horizon Agent on Window systems when we are creating “golden image” for a desktop pool. While it is possible to create golden image manually it is much better to build it automatically with one of the available automation tools. While Server/Virtualization teams prefer to create and maintain Windows OS templates using their tools of choice, the Desktop/Frontend teams quite often rely on Microsoft Configuration Manager (ConfigMgr for short) which is a wildly adopted Enterprise Device Management solution with large footprint at a lot of our customers.
Assumptions
This article assumes:
- The reader has working Configuration Manager site
- The reader is familiar with Configuration Manager Application Management
- The reader is familiar with deployment options for Horizon Agent
Get Horizon Agent
Download latest version of Horizon Agent from Omnissa Customer Connect.
Side note – you need an eligible customer connect account to download the Horizon Agent installer.
Extract VMware tools
Follow this steps to extract the downloaded content:
step 1 – download ZIP file containing the ISO
step 2 – extract ISO file from ZIP


step 3 – extract contents of the ISO to a folder, for example C:TempVMwareTools

step 4 – copy contents of C:TempVMwareToolsWindows to the file share which contains your ConfigMgr application sources. In this article we use UNC path \\cloudworkspace.blog\SCCM\Applications\Omnissa\Horizon Agent
Create Configuration Manager Application
Application pre-requisites
Before we can actually create the application in Configuration Manager we need to do two things:
- create and validate silent installation command line
- get MSI GUID which we will use as detection method
Silent installer
Omniss provides good overview of silent installation parameters on TechZone, you can tailor installation parameters for your own environment.
The basic command line will look like:
setup.exe /S /v “/qn REBOOT=R ADDLOCAL=ALL”
- REBOOT=R makes sure that system reboot will be supressed
- ADDLOCAL=ALL deploys including all components
For this article I’ll use the following command line:
setup.exe /s /v”/qn REBOOT=R /l*v “”%WINDIR%Logs%COMPUTERNAME%-vmwaretools.log”” ADDLOCAL=ALL”
It will install all components, write verbose installation log to C:WindowsLogs and suspend system reboot.
Please note – I’m using setup.exe and not setup64.exe. The reason is quite simple – on the 64-bit systems it will automatically launch setup64.exe, but using setup.exe eliminates the necessity to create distinct commands for 32-bit and 64-bit systems.
MSI GUID
We need to retrieve MSI GUID which we’ll use to create detection rule for Configuration Manager deployment type.
Install VMware Tools on a test VM either using silent install from the previous part or manually running setup.exe and open Regedit on that test VM.
Navigate to ComputerHKEY_LOCAL_MACHINESOFTWAREMicrosoftWindowsCurrentVersionUninstall and search for VMware Tools

The MSI GUID for this version of VMware Tools is {65A35679-0C08-4C9A-9AC3-46417F198653}. Copy this GUID as we’ll need it a few steps later.
The other way to find MSI GUID is to run setup.exe with /A parameter, for example
setup.exe /A c:driversextracted /s /v/qn
After executing the above command the contents of the installer will be extracted to the folder C:DriversExtracted.
If you look in the C:DriversExtracted folder, you’ll notice a MSI file in the format of {GUID}.msi. like for example

and this is the GUID we are looking for :D.
Create VMware Tools application
We’ve got all required components like application installer, silent command line and MSI GUID and now we can proceed with creating the application itself.
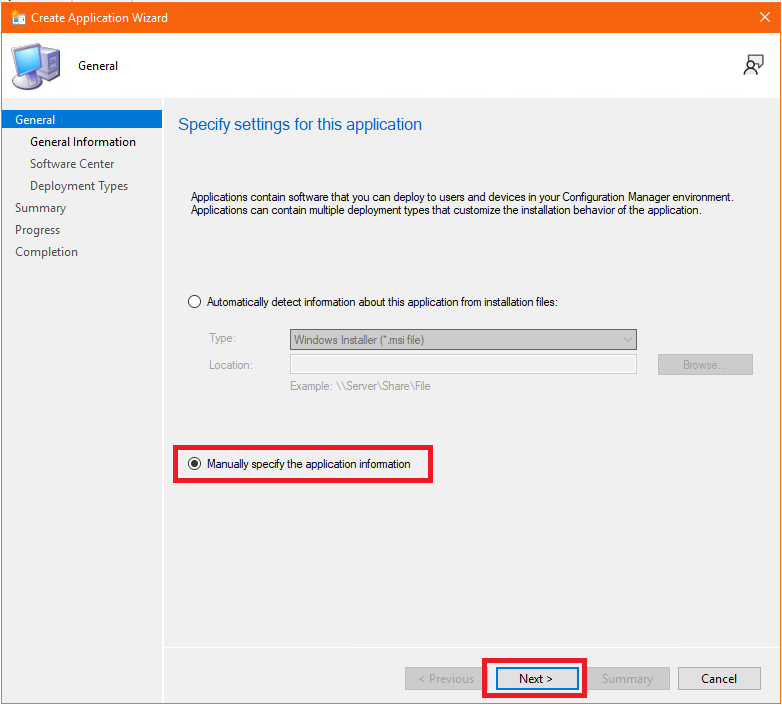
Launch Application Creation Wizard
Select “Manually specify the application information” and click on Next
Specify required information like application name, publisher and version

On this page we can specify information which will be visible for the users in the Software Center.
Set the application name as you want the users to see it and click on “Browse…” to import application icon

Navigate to the share with ConfigMgr application sources where you saved extracted installer, in this example \cloudworkspace.blogSCCMApplicationsVMware Tools 12.1.5, and double click on the ICO file.

The VMware icon has been imported. Click on Next to proceed.

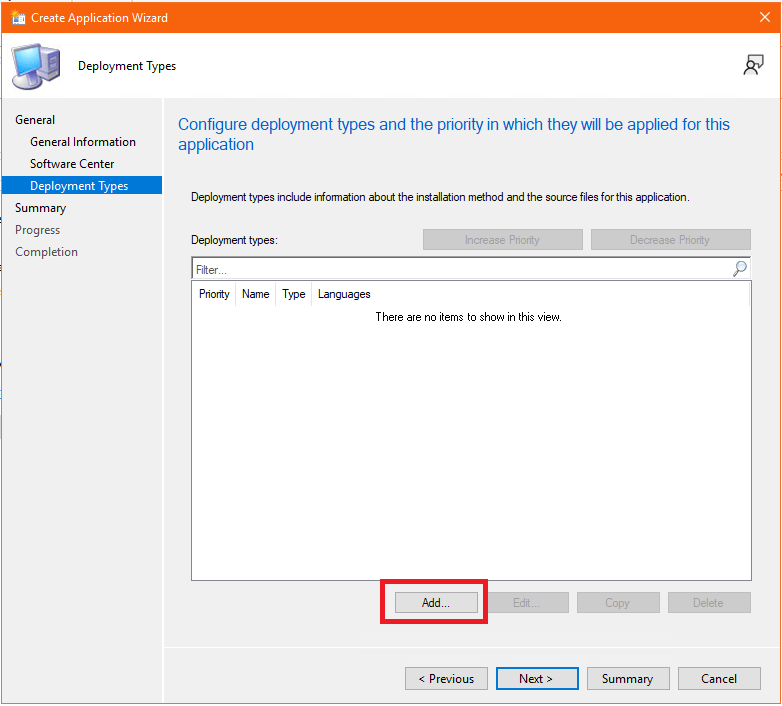
Click on Add to create a deployment type for VMware Tools application.
Select “Manually specify the deployment information” and click on Next

Give deployment type a name and click on Next.
Please note – make sure you use good descriptive name as this is the name you’ll see in ConfigMgr client logs, because when you use the same name for other deployment types you won’t be happy if you’ll need to find out which application is actually failing 😉

Fill in the content information:
Content location – UNC path to the share with ConfigMgr application sources where you saved extracted installer, in this example \cloudworkspace.blogSCCMApplicationsVMware Tools 12.1.5
Installation program – the silent installer command line you’ve previously tested. In this example it is setup.exe /s /v”/qn REBOOT=R /l*v “”%WINDIR%Logs%COMPUTERNAME%-vmwaretools.log”” ADDLOCAL=ALL”
Uninstall program – MsiExec.exe /x {MSI GUID} /q, where MSI GUID is the GUID you’ve retreived from the registry after installing this version of VMware Tools. For example MsiExec.exe /x {65A35679-0C08-4C9A-9AC3-46417F198653} /q
Click on Next

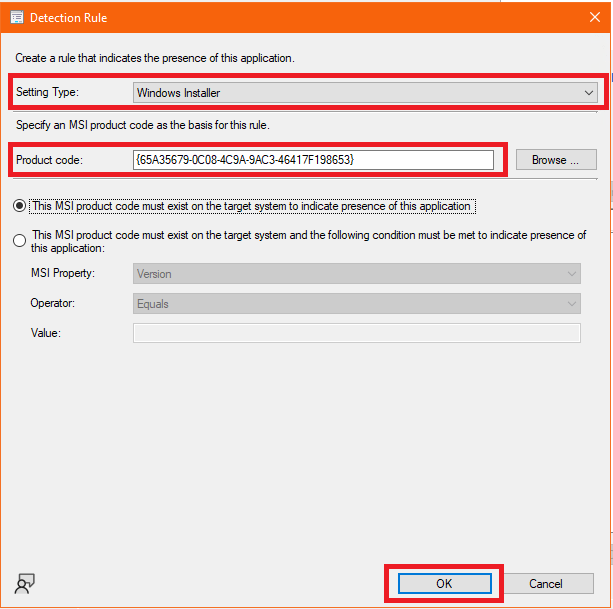
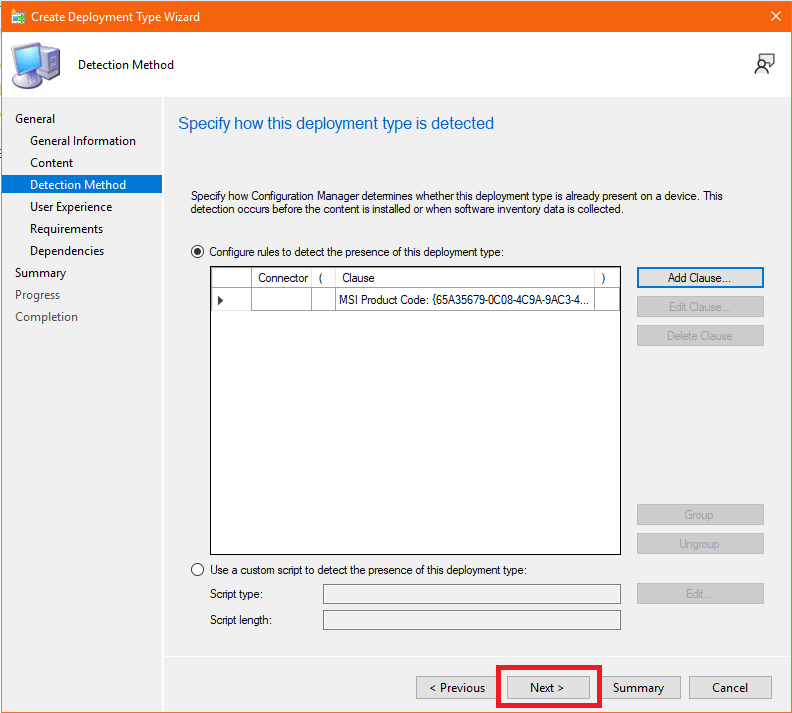
On detection method page click on “Add Clause…”

In detection rule window choose:
Setting Type – Windows Installer
Product code – MSI GUID. This is again the GUID which was extracted from the registry.
and click on OK
Note – I prefer using Windows Installer whenever possible as in my experience it is most reliable detection method.
Click on Next
Configure user experience settings
Installation behavior – Install for system
Logon requirement – Whether or not a user is logged on
Installation program visibility – Normal
Note – these settings are mandatory if you want to use this application in OS Deployment Task Sequence.
Click on Summary as we don’t need to specify requirements or dependencies in this example.

Review summary information and complete Deployment Type creation wizard.
Click on Summary to complete Application creation wizard.
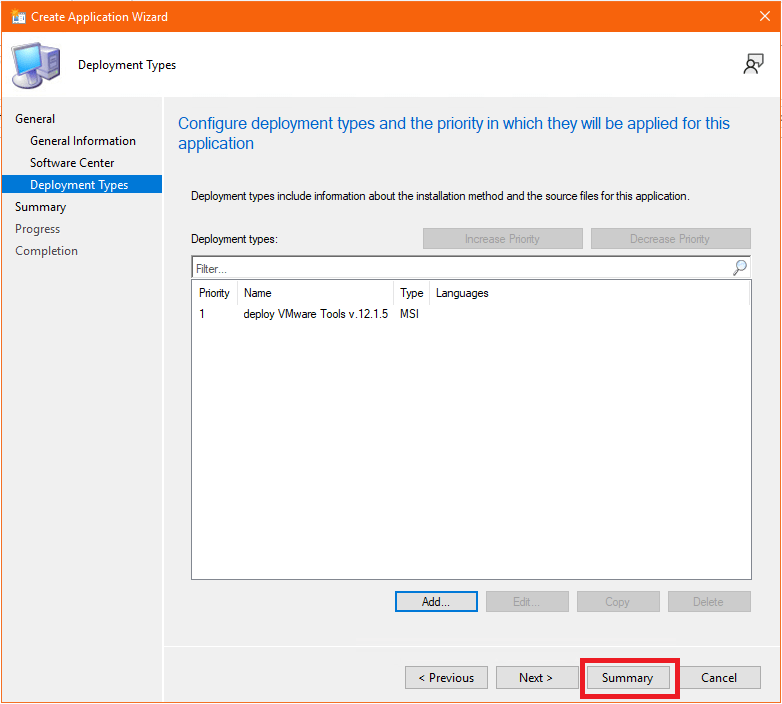
VMware Tools application has been created. Now you can send it to the Distribution Points and use in OS Deployment Task Sequences or deploy to device collections.


Leave a Reply